How to Change or Add a Custom Favicon Onto Your Blog on Blogger
Favicon is indeed a tiny 16px X 16px size picture/icon which you can find next to any websites URL in browser address bar. Usually, it's a websites logo. You can add your own fancy favicon to get visitors attention. If you want to upload/add your own custom favicon, whether it's static or animated picture, it should be of square size and less than 100KB. It can be of .png or .gif or .jpg or .ico format. If you don't have such square and less than 100KB icon, you can search web, where you can find different websites offering free services to create favicon for your blog/website. Creating and adding of favicon is very easy and can be done in few minutes
Step 1 :- Go to www.favicongenerator.org and upload your favorite image of which you want to create a favicon. ( Image size should be more than or equal to 16px X 16px )
Step 2 :- Write your blog title as scrolling text and press Generate Favicon button
To Add a Static Favicon Follow These Steps :-
Step 1 :- Go to www.favicongenerator.org and upload your favorite image of which you want to create a favicon. ( Image size should be more than or equal to 16px X 16px )
Step 2 :- Write your blog title as scrolling text and press Generate Favicon button
Step 3 :- Right Click on favicon.ico Image and select Save Image As to save icon on your computer.
Step 4 :- Log In to your blogger account > Go to Layout > Click Edit Favicon.
Step 5 :- Browse and upload your icon, done, you have added your own custom favicon successfully.
Step 3 :- Right Click on animated favicon.gif Image and select Save Image As to save animated icon on your computer.
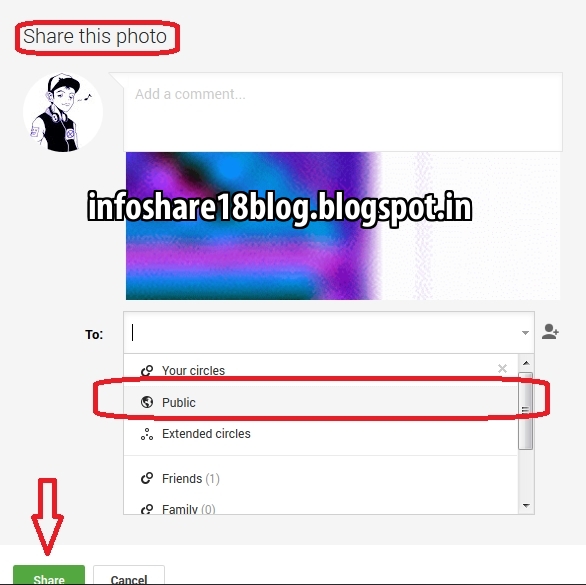
 Step 4 :- Go to your Google+ account and upload that
  animated icon and share it publicly.
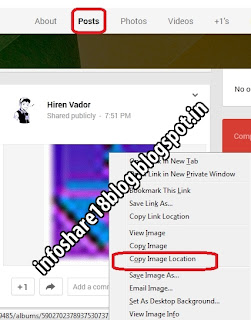
Step 5 :- Check " Posts" shared by you and select post in which you have shared your animated icon.
Step 6 :- Right click on that animated icon and select " Copy Image Location " and paste it in other Tab/Window.
Step 7 :- Go to Template > Edit HTML.
Step 8 :- Find " <b:skin> ".
Just above it paste these code -
<link href= ' YOUR LINK ' rel= ' icon ' type='image/gif '/>
Step 9 :- Replace YOUR LINK with the link which you had opened/pasted in other tab. Save your template and job is done. Now view your blog to see new animated favicon in action.
If you still don't see your new favicon, clear browser's cache and again view your blog, you can see now.
To Add a Animated Favicon Follow These Steps :-
Step 1 and Step 2 are same as aboveStep 3 :- Right Click on animated favicon.gif Image and select Save Image As to save animated icon on your computer.
 Step 4 :- Go to your Google+ account and upload that
  animated icon and share it publicly.
Step 5 :- Check " Posts" shared by you and select post in which you have shared your animated icon.
Step 6 :- Right click on that animated icon and select " Copy Image Location " and paste it in other Tab/Window.
Step 7 :- Go to Template > Edit HTML.
Step 8 :- Find " <b:skin> ".
Just above it paste these code -
<link href= ' YOUR LINK ' rel= ' icon ' type='image/gif '/>
Step 9 :- Replace YOUR LINK with the link which you had opened/pasted in other tab. Save your template and job is done. Now view your blog to see new animated favicon in action.
If you still don't see your new favicon, clear browser's cache and again view your blog, you can see now.
Subscribe to:
Post Comments
(
Atom
)


No comments :
Post a Comment